Are your brake pads safe enough for the road? Worn brake pads can sneak up on you, putting both your safety and vehicle at risk. Neglecting regular brake checks often leads to brake pedal issues, steering wheel vibrations, or even worse—complete brake failure. Daily driving, especially with heavy loads or city traffic, puts constant pressure on your brake pads. This can wear down essential components like the brake caliper, brake rotor, and brake discs. If left unchecked, you may face costly repairs and compromised brake performance.
Don’t wait until it’s too late. Learning how to check brake pads is key to catching problems early and keeping your brake system reliable. Our quick guide will help you recognize common signs of brake pad wear and perform a proper brake pad inspection. Keep reading to stay ahead of potential issues and avoid expensive trips to the service center.
Why is It Important to Check My Brake Pads?

Brake pads are a crucial part of your vehicle’s braking system. Over time, they wear down due to constant friction and everyday use. If you don’t check them regularly, worn brake pads can reduce your car’s ability to stop effectively. This not only puts your safety at risk but also increases the likelihood of brake failure.
When brake pads wear out, they can also damage other important parts, such as the brake rotor, brake discs, and brake caliper. This can lead to expensive repairs. Regular inspections help you catch any issues early, keeping your brakes in top condition. By staying on top of brake checks, you can avoid costly repairs and ensure your vehicle’s brake performance stays reliable.
What are The Tools Needed to Check My Brake Pads?
To check your brake pads, you’ll need a few essential tools. First, you’ll need a jack and jack stand to lift the vehicle safely. A lug wrench will help you remove the tires and give you access to the brake assembly.
A flashlight is useful for getting a clear view of the brake pads during your visual inspection. Wearing gloves can also make the job easier by providing extra grip and protecting your hands.
For more accurate results, a brake pad gauge can measure the thickness of the pads. With these tools on hand, you can easily inspect the brake pads and check for signs of wear.
How to Check Brake Pads Like A Pro?

Checking your brake pads is a straightforward process that can save you from potential brake failure and costly repairs. While it may seem intimidating at first, following these 5 simple steps ensures your vehicle remains safe and performs at its best. If you’ve noticed common signs like squeaking noises or a soft brake pedal, regular brake pad inspections become even more essential. Here’s a quick guide to help you complete this important task with ease.
Step 1: Prepare Your Vehicle
Before starting, park your vehicle on a flat surface and engage the parking brake. This ensures the car stays stable while you work on it. For added safety, place wheel chocks behind the rear tires to prevent accidental movement. Properly preparing your vehicle is crucial, as any sudden shifts could cause injuries or damage.
Additionally, make sure the brake fluid reservoir is sealed to avoid spills when compressing the brake caliper later in the process.
Step 2: Remove The Wheel
Once the vehicle is secure, use a jack and jack stands to lift it safely. Loosen the lug nuts on the wheel you’re inspecting, then carefully remove the tire.
Removing the wheel gives you clear access to the brake assembly and allows you to check the brake pads. This step is necessary because the brake pads are hidden behind the wheel and can’t be visually inspected without removal. As you take off the tire, also check for any wear on surrounding components like the brake discs and brake dust buildup.
Step 3: Inspect The Brake Pads
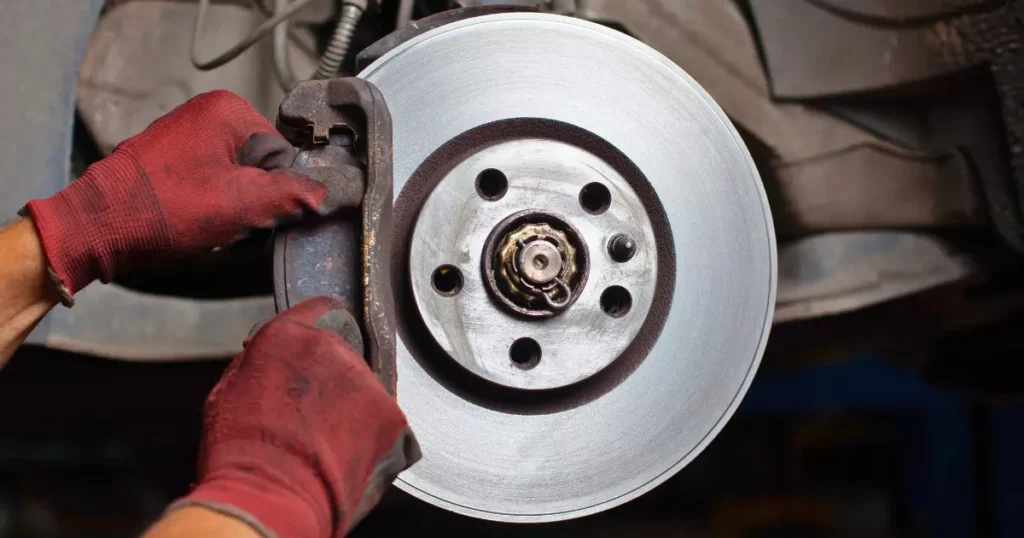
With the wheel removed, visually inspect the brake pads. Look for signs of excessive wear, such as thinning or uneven surfaces. Brake pad thickness is crucial—if the pads are below the manufacturer’s recommended minimum thickness, replacement is necessary.
For a precise measurement, use a brake pad gauge. Inspecting the pads for wear or damage can help prevent issues like a soft brake pedal or poor stopping power. For example, overly worn pads may result in longer stopping distances, putting you at risk on the road.
Step 4: Check The Brake Pad Wear Indicators
Many brake pads come with wear indicators—small metal tabs that alert you when the pads are worn. As the brake pad material thins, the wear indicator will touch the brake rotor, producing a high-pitched squealing sound.
If you hear this noise or see the wear indicator contacting the rotor, it’s time to replace the brake pads. Ignoring this step can lead to more severe brake damage, such as rotor scoring, which can be costly to repair.
Step 5: Reassemble and Test
After inspecting or replacing the brake pads, reattach the wheel and tighten the lug nuts securely. Lower the vehicle carefully and press the brake pedal several times to test the brakes before driving.
Make sure the brake pedal feels firm and responsive. There are different types of brake pads. So testing the brakes ensures everything is functioning properly. If the pedal feels soft or unresponsive, there could still be an issue with the brake lines or brake fluid. This final check is critical for your safety before getting back on the road.
How Often Should I Check My Brake Pads?
It’s generally recommended to check your brake pads every 10,000 to 15,000 miles, depending on your driving habits. However, if you frequently drive in stop-and-go traffic, haul heavy loads, or travel through mountainous areas, your brake pads may wear out more quickly. Including brake checks during routine vehicle maintenance, such as tire rotations or oil changes, is also a good practice. This proactive approach helps maintain optimal brake performance and safety.
Certain driving styles, like aggressive braking or high-speed driving, can cause brake pads to wear out faster than normal. If you notice any warning signs, such as squealing noises, vibrations in the brake pedal, or reduced stopping power, it’s essential to inspect your brake pads immediately. Addressing these issues early can help prevent costly repairs and avoid damage to other components, such as the brake rotor or caliper.
What are the Signs that I Need a Professional to Check My Brake Pads?

When it comes to your vehicle’s safety, properly functioning brakes are essential. While routine brake pad checks can often be done at home, there are times when more serious issues require the expertise of a professional. Ignoring warning signs can lead to dangerous driving conditions and costly repairs down the line. If you’re unsure whether it’s time to call in a professional, here are some key signs that should prompt you to seek expert help.
Grinding or Squealing Noises
If you hear grinding or squealing sounds when you press the brake pedal, it’s a clear sign that your brake pads are excessively worn. Grinding typically means that the brake pad material is gone, and the metal backing plate is making contact with the brake rotor, which can cause serious damage. Squealing is often caused by the brake pad wear indicator touching the rotor, signaling the need for a replacement.
Vibrations or Pulsations in the Brake Pedal
A vibrating or pulsating brake pedal is a common sign of warped brake rotors, which can result from worn or uneven brake pads. This issue affects your vehicle’s braking efficiency and requires professional attention to avoid further damage to the brake assembly.
Soft or Spongy Brake Pedal
If the brake pedal feels soft or spongy when pressed, it could indicate air in the brake lines, a brake fluid leak, or severely worn brake pads. Any of these problems can compromise your stopping power and require a mechanic to inspect the brake system.
Uneven Brake Pad Wear
When inspecting your brake pads, if you notice that one side is significantly more worn than the other, this could be a sign of issues with the brake caliper or other components. Uneven wear affects braking balance and should be checked by a professional to avoid further complications.
Decreased Braking Performance
If your vehicle takes longer to stop, or you have to press harder on the brake pedal, it could be a sign of worn-out brake pads, a damaged brake rotor, or issues with the brake fluid. Reduced braking performance is a serious safety concern and warrants immediate attention from a professional.
Brake Warning Light
If your vehicle’s brake warning light comes on, it could indicate several issues, including worn brake pads, low brake fluid, or other problems within the braking system. It’s best to take your car to a professional to diagnose the issue and prevent potential brake failure.
Wrapping Up
Knowing how to check brake pads is crucial for maintaining your vehicle’s safety and avoiding costly repairs. Regular brake pad inspections help you catch wear and tear early, ensuring reliable braking performance and preventing damage to other essential components like the brake rotor and caliper. By staying proactive, you not only extend the life of your brake system but also save time and money in the long run.
If you’re unsure about your brake pads or notice any warning signs, it’s time to call the experts. At JP Auto & Fleet Services, we offer brake services to keep and improve the safety of your vehicle. Our skilled technicians also provide convenient mobile brake repair in Lewisville, Denton, Carrollton, Frisco, and throughout the Dallas-Fort Worth area.
Don’t wait—schedule your service today at 214-836-9333 and drive confidently knowing your brakes are in expert hands.


